Past Work - Etched Sycamore Key
Background
This is one of possibly three development paths that I'm taking on a college project called "Dialogue", where students have been encouraged to experiment, push boundaries, get out of our comfort zones, initially in collaboration with other students - in my case, Val Muddyman and K.J.Greeves.Fairly early in in the project we decided on a starting point of sycamore keys, which happened to be helicoptering onto the ground in large numbers at the time. We liked their delicacy and symbolism - procreation, transience, flight, the wind.
At the end of Part 1 we gave a joint presentation of our work, which I've posted in this blog, covering subsequent developments. We're going our separate ways in Part 2 - I'm continuing with sycamore keys and the others are pursuing unrelated topics.
Introduction
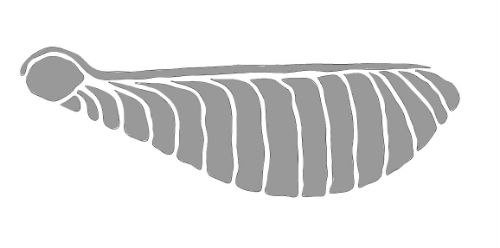
I wanted to capture the flight pattern of the keys at the same time as preserving their delicacy, so I hit on the idea of creating a stack of float glass and etching a key on each layer, each time rotating it by 30 degrees.
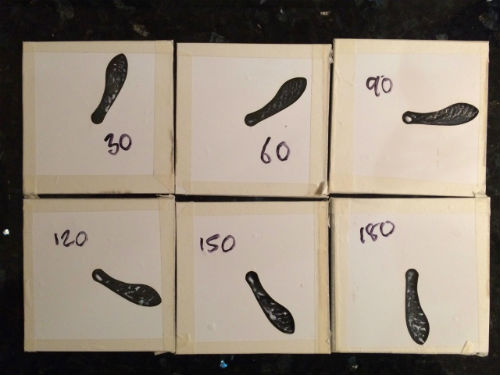 | I used Rhino to draw the key in a 100-mm-square and then make 11 copies of it each time rotating the key 30 degrees. I used this to cut them out from sticky-back platsiv using the College laser cutter, I then cut some 100-mm-squares of 3-mm-thick float glass and stuck on the masks, taping the edges of the glass. I created the veining in the keys by spreading some lines of PVA glue using a needle. I then sand-blasted each square for a few minutes. The photo shows the first 6 of the 12 squares I made. | |||
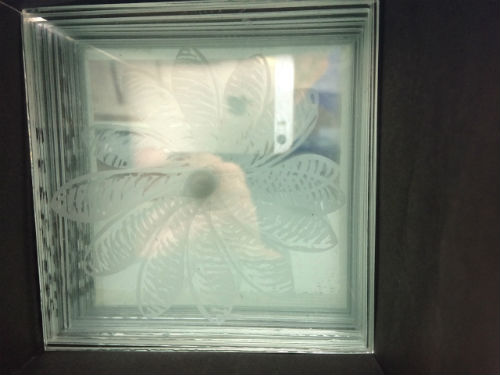
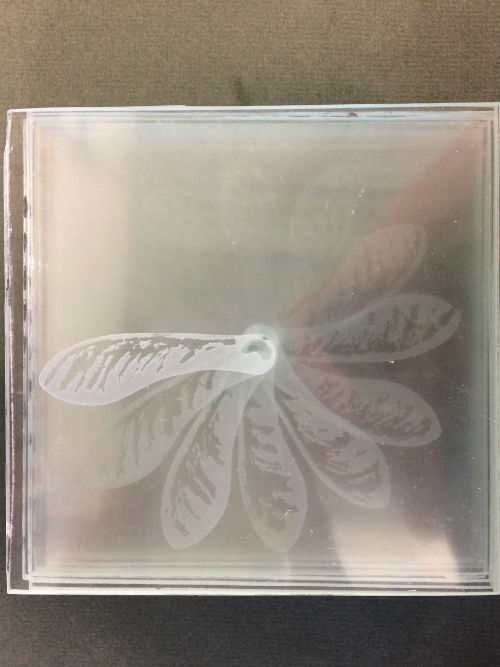 | This was the result. I has used a spare pane of glass for my garden shed that had been stored in cardboard for several years. The glass turned out to be cloudy, making it difficult to see all the keys. The veining was a bit rough. On the other hand, I though the concept showed promise... | |||
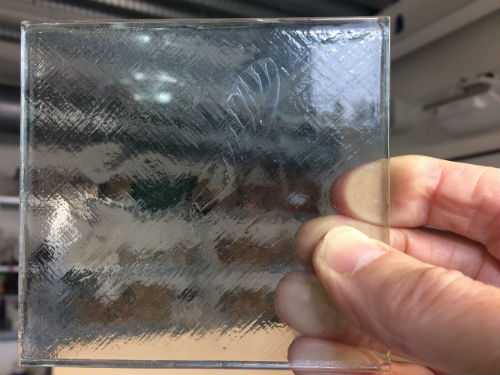
 | .. so I bought some clean glass and repeated the exercise. A lot better! I ought to try and make the veining finer. I've decided to add a lot more layers so the keys gradually fade away in the distance. I'm also starting to think about how I should present it... | |||
 | I tried engraving one sheet and fusing another sheet onto it, which removed the sand-blasted surface. Think the result is too subtle | |||
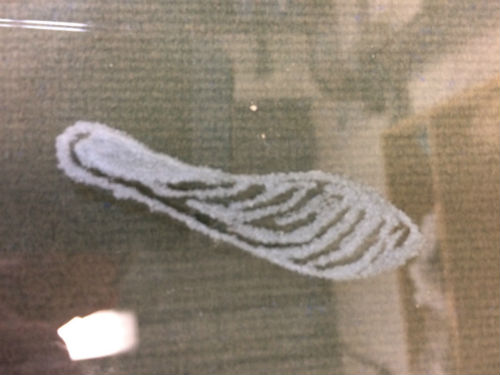 | I also tried engraving rather than masking and sand-blasting. I don't like the fuzzy edges. I'll try watering down the PVA glue and applying it more finely. | |||
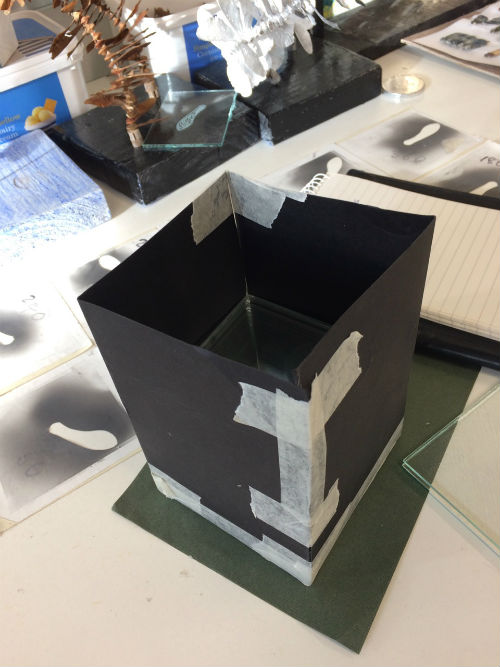 | I tried replicating putting my stack of glass plates into something like a wall, by covering the sides with black cardboard. | |||
 | Not impressed with this. You can't really see that there's 24 layers and there's lots of reflections. Conclusions:
| |||
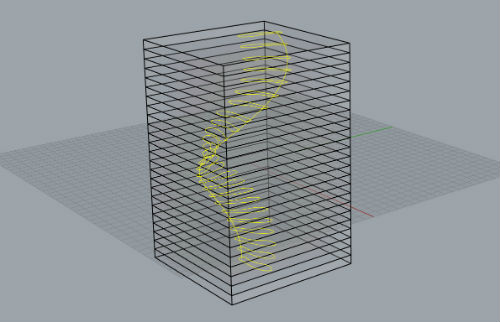 | I played around with accommodating these conclusions in a CAD model, pictured left. These panels of glass are 150-mm-square, rather than 100-mm. There's 24 panels and the seed rotates 10 degrees in each one, meaning that the overall rotation is 240 degrees - 2/3 of a full circle. The glass is 10-mm thick, as opposed to 3-mm, so the stack is 240-mm-high. I think I've come up with a bit of a brainwave on how to stop the panels sliding around. I don't want to glue them together because I think you'd see the glue or it would spoil the engraving. But I also don't want to have anything outside the stack spoiling its elegance. Solution: grind a small hemisphere in the bottom and top of each panel where the seed would be carried and insert a pearl there! I *LOVE* this idea! It's *SO* elegant! As a result I've charged ahead and ordered the glass. I've chosen low-iron glass so it's less green and I've got them to polish the edges (so I can avoid almost all the cold working). I had a lot of trouble getting anybody to ensure that each panel of glass would be the same size. Most of them said there was a tolerance of plus or minus 2 or 3-mm. In other words, one piece of glass could be up to 6-mm bigger than another. I found one supplier who said it could make the panels identical but they might not be exactly 150-mm, which is fine! | |||
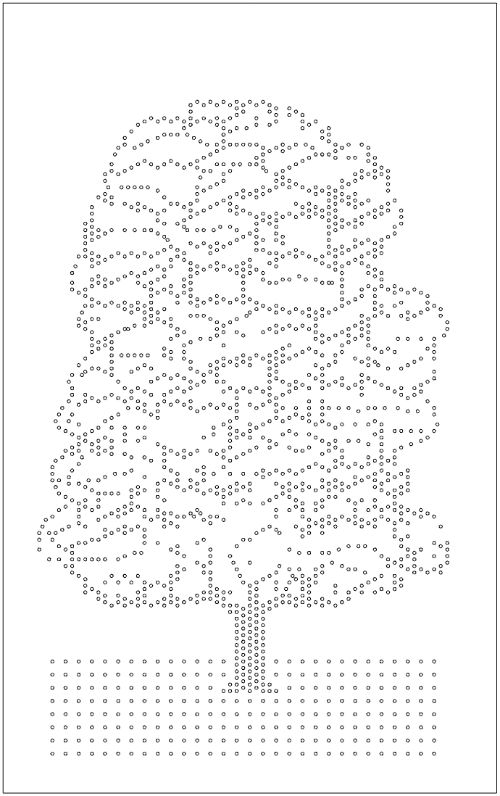 | I had thought of etching a sycamore tree on one face of the stack so you saw the tree when you looked sideways and you saw the seeds when your looked downwards. I created the image, left, entirely from tiny circles, thinking (a) it looked nice and (b) it was a reference to the huge numbers of seeds shed by sycamore trees every autumn (an average of 10,000). I've decided to hang fire on this idea until I've completed the seeds spiraling down the stack. I have a feeling that might be sufficient and adding a tree might be over-kill. | |||
 | I've also played around trying to make a mask for the sycamore seed. The shaded areas would be sand-blasted. I would grind a hemisphere in the seed receptacle, on the left, and pop in a (fake) pearl. | |||
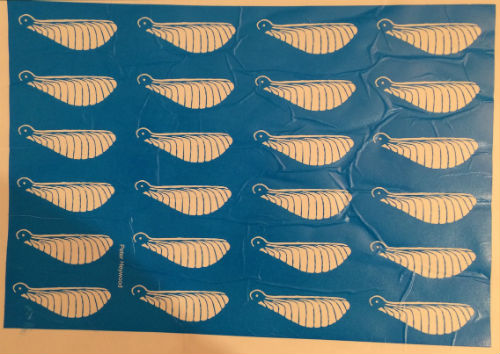 | I got Crystal Galleries to make 40 self-adhesive stencils | |||
 | I tested one of the stencils on a scrap piece of glass - happy with the result! The hemisphere for the pearl will enlarge the dot where the seed is. |
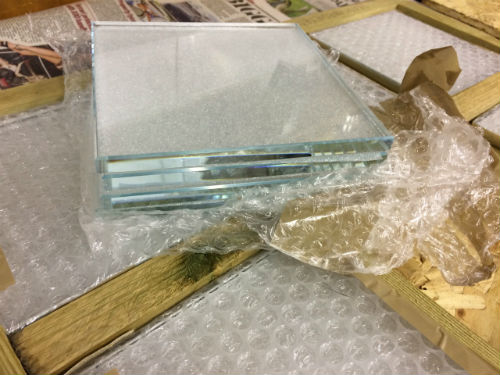 | I ordered the glass from an outfit in Norfolk called Glasstops. It's low iron (less green) and has polished edges. Looks lovely!!! | |||
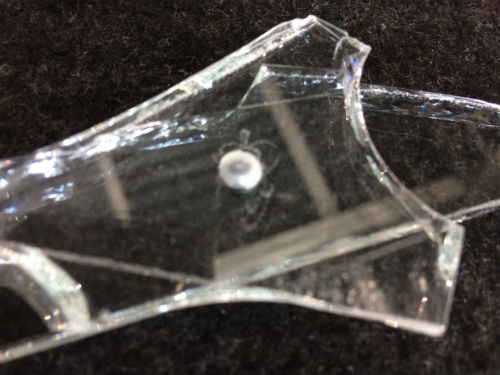 | I tested engraving 2 hemispheres in some scrap 6-mm-thick glass and popping in a pearl so they can't slide about. It works! | |||
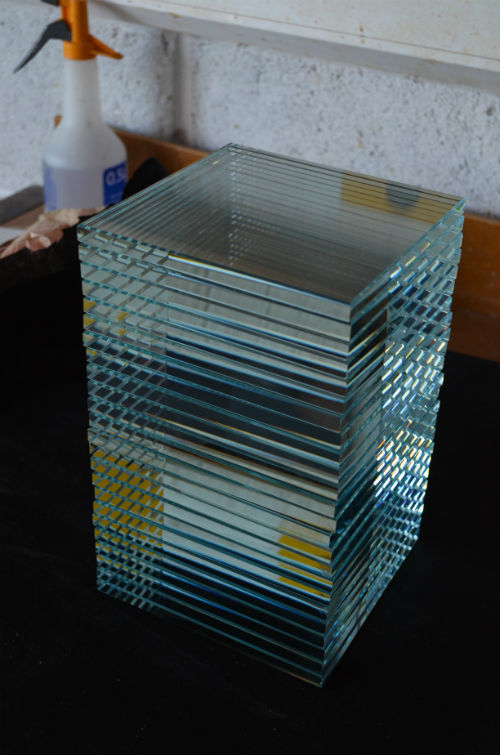 | The stack of 150-mm-squares of glass looks stunning! I'm surprised at all the reflections within it. | |||
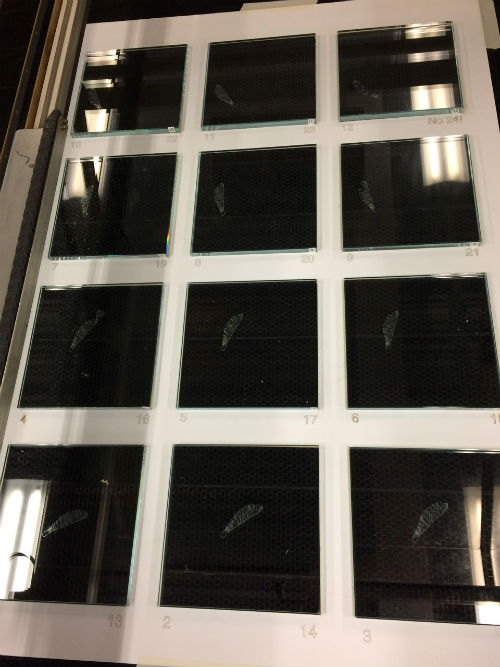
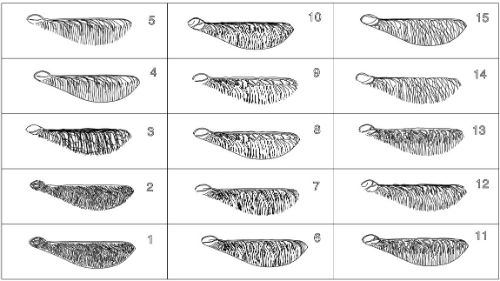 | Jason Marks, a coordinator at College told me: (a) it's possible to engrave using the laser cutter (b) try engraving them on microscope slides to start with So I bought some slides and drew 15 examples of sycamore keys in Rhino. | |||
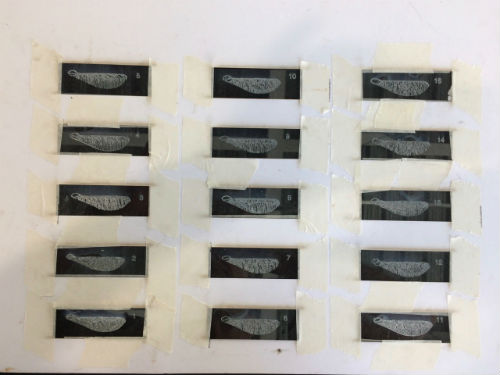 | I also drew 15 windows so I could position each slide in a jig made from card that I cut on the laser cutter beforehand. The first set of keys were engraved on "glass" setting which turned out to be a but excessive - its cracked some slides and made the lines quite thick. | |||
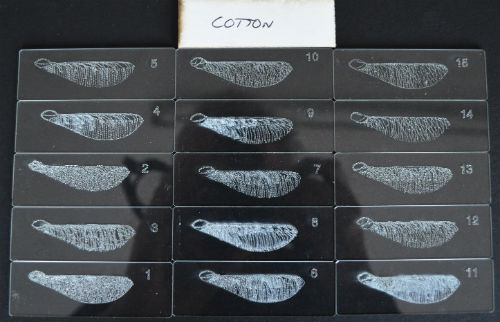 | In a subsequent session on the laser cutter I tried a various power settings - for paper, then card, then cotton, then card again with slower speed and higher power. The paper and card ones created very fine lines but missed some lines altogether. The cotton setting was a good compromise - not quite so fine lines but they were all there, and the slides didn't crack. | |||
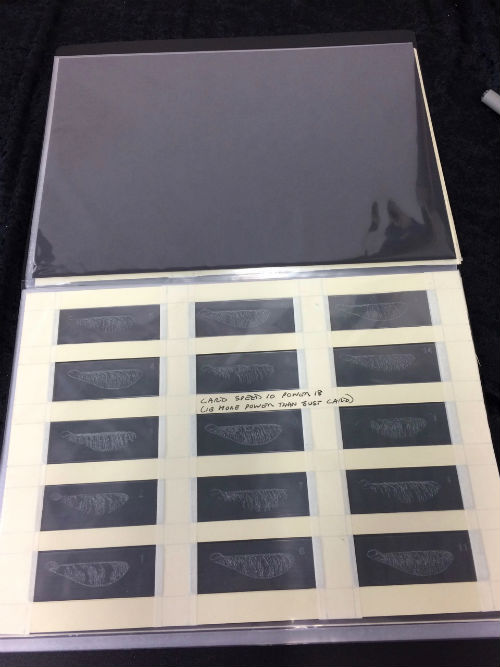 | I ended up putting all 60 slides in an album. Almost looks like a work of art! | |||
 | I made a jig out of mount-board to hold the glass panels on place and then engraved a key on each one so they would form a spiral. One or two of the engravings appeared to miss some lines. I think this is probably because of metal in the glass in those locations. | |||
 | Before I engraved the glass I engraved the card that I'd cut to form the jig. I noticed that I could flip the stack of cut-outs and the engraved key would appear to rotate. As I had some spare time on the laser cutter I made a 35-page "flip-book" using less stiff card, pictured. | |||
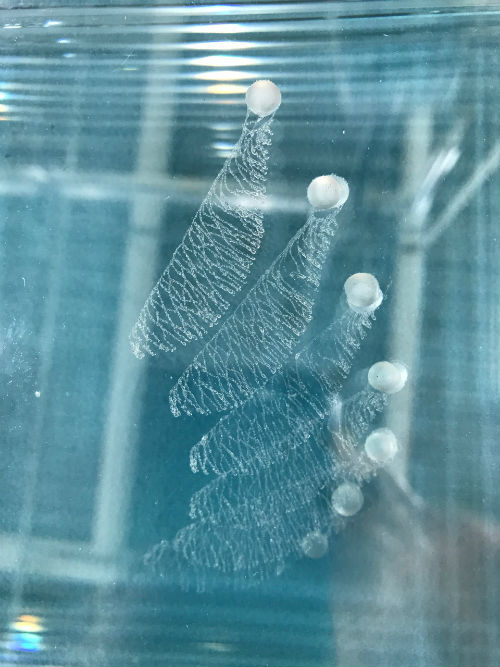 | I've now completed engraving hemispheres in the glass panels so that I can insert pearls between each layer. | |||
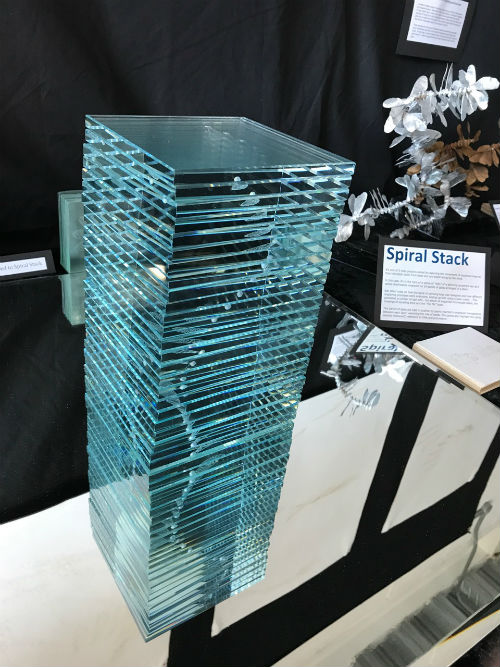 | I've ended up calling this "Spiral Stack", for want of a better title. It's now on display, awaiting assessment at Plymouth College of Art. As usual, I like some aspects, notably...
...and I'm disappointed with other aspects, notably...
| |||