Past Work - Ring Repair
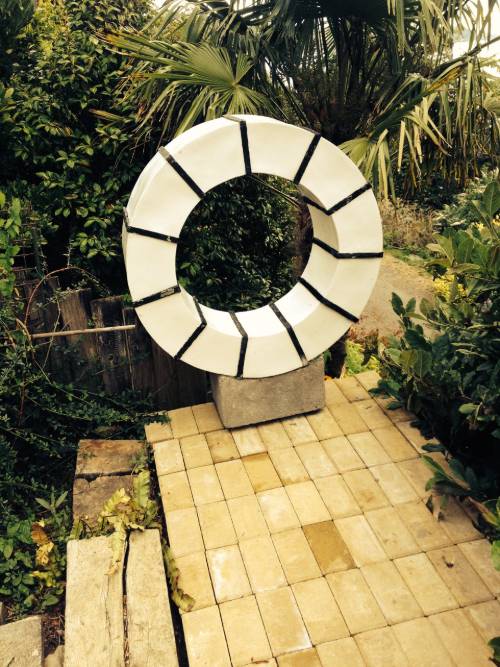 | This is a giant ring formed from 11 slip-cast ceramic segments. I installed it in our garden in 2014 after taking the best part of 3 years to make it - for more on why it took so long please click on this link. | |||
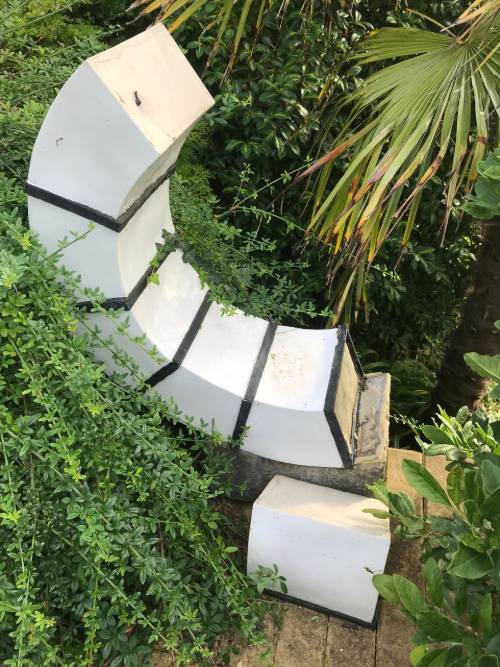 | In July 2019 we returned home after a weekend away to discover that the ring had fallen apart. 5 segments remained in place. Of the 6 others, 2 were intact and the other 4 were broken to varying degrees - in one case smashed into lots of pieces. Making some replacement segments wasn't really an option; I'd thrown away the original slip-casting mould and the idea of starting from scratch on such a difficult process didn't appeal. I gathered up every single scrap of broken ceramic and started to piece bits together, like a 3D jig saw. In the end I decided to make a feature out of the repair. I could glue things together but not with tight joints, and I was missing a few small pieces, so I decided to fill all the joints and gaps with black epoxy filler. | |||
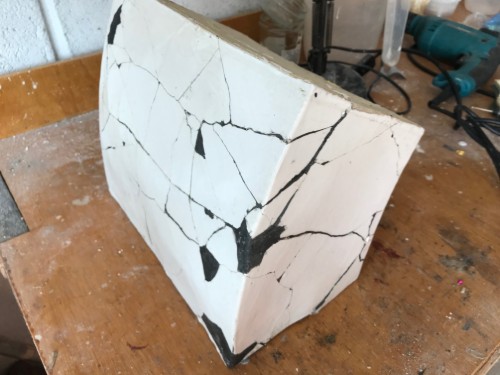 | This is the repair of the most damaged segment. At present (13th August 2019) I'm still trying to figure out how to glue them back into the ring shape. It raises some awkward issues because every segment is slightly different - their shape was contorted as they dried and were fired. Originally, I assembled the whole ring flat on my workshop floor but I can't do that this time. I'm leery about assembling half of it on the floor and then discovering the whole thing doesn't match up perfectly with what's still in place. More thought is needed! | |||
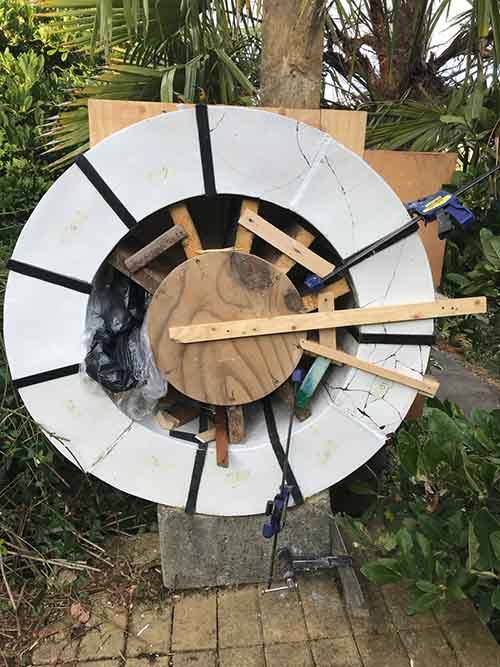
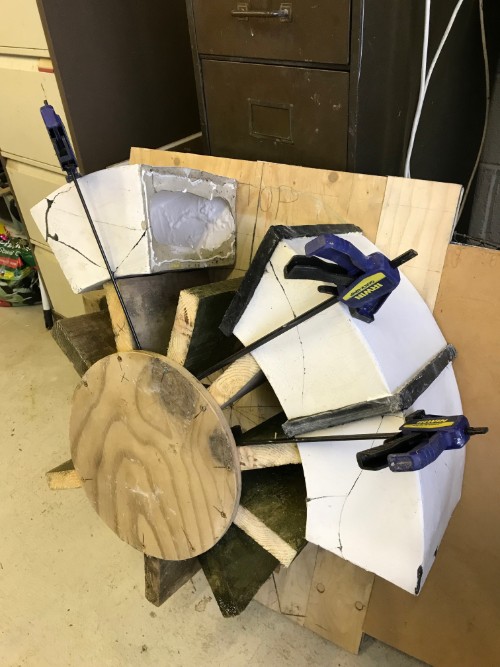 | Result: I've made this jig that fits onto the remaining part of the ring and will also support the repaired segments so that I can position them as best as possible before gluing them together. I might have to glue together the repaired segments, then take off the repaired section to renovate the black bands over each joint. It's gradually sinking in that repairing the segments was the easy bit - assembling them is challenging. I'm still puzzling over what materials to use for gluing and the replacement black bands. | |||
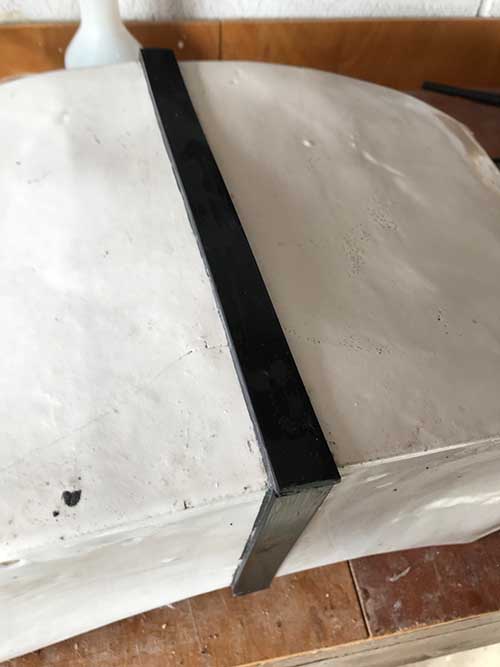 | Replacing the black bands covering each joint was a problem. I'd cast the original joints in situ, before installing it, when I could lay the ring on its sides or on its edge and rotate it. This wasn't an option this time around because I had to rebuild the ring on top of 2 segments that were still firmly anchored to the base. Also, I couldn't work out the order of the original segments so I had no way of recreating exactly the same shape joint. As a result I couldn't re-use the joint material I'd rescued. After much thought I decided to do the following:
| |||
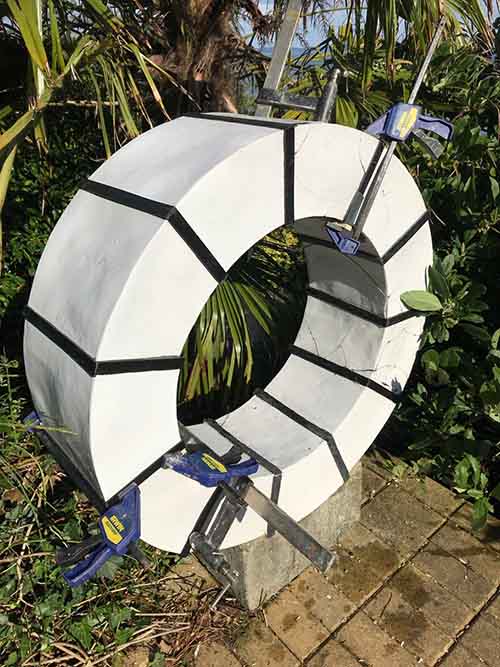
 | Progress shot. Although my original photo of the broken ring showed 5 segments still in place, the 3 on the left came loose so I ended up gluing together 9 of the 11 segments. I used all sorts of wedges and other packing to try and line everything up as best as possible. It was difficult, and the result was far from perfect - but that's part of the charm of this object, as are the filled in cracks. | |||
 | Nearly completed repair. Just need to neaten up some of the joints and do a bit more filling with epoxy putty. The whole thing feels really solid - don't think it will fall apart again any time soon! | |||